

Disclaimer: I work at Microsoft. And you might think that this makes me a bit biased about the current topic. However, I was an enthusiastic MacOS / MacBook user – both privately and professionally. I work as a so-called “Cloud Solution Architect” in the area of Open Source / Cloud Native Application Development – i.e. everything concerning container technologies, Kubernetes etc. This means that almost every tool you have to deal with is Unix based – or at least, it only works perfectly on that platform. That’s why I early moved to the Apple ecosystem, because it makes your (dev) life so much easier – although you get some not so serious comments on it at work every now and then 🙂
Well, things have changed…
Introduction
In this article I would like to describe how my current setup of tools / the environment looks like on my Windows 10 machine and how to setup the latest version of the Windows Subsystem for Linux 2 (WSL2) optimally – at least for me – when working in the “Cloud Native” domain.
Long story short…let’s start!
Basics
Windows Subsystem for Linux 2 (WSL2)
The whole story begins with the installation of WSL2, which is now available with the current version of Windows (Windows 10, version 2004, build 19041 or higher). The Linux subsystem has been around for quite a while now, but it has never been really usable – at least this is the case for version 1 (in terms of performance, compatibility etc.).
The bottom line is that WSL2 gives you the ability to run ELF64 Linux binaries on Windows – with 100% system call compatibility and “near-native” performance! The Linux kernel (optimized in size and performance for WSL2) is built by Microsoft from the latest stable branch based on the sources available on “kernel.org”. Updates of the kernel are provided via Windows Update.
I won’t go into the details of the installation process as you can simply get WSL2 by following this tutorial: https://docs.microsoft.com/en-us/windows/wsl/install-win10
It comes down to:
- installing the Subsystem for Linux
- enabling “Virtual Machine Platform”
- setting WSL2 as the default version
Next step is to install the distribution of your choice…
Install Ubuntu 20.04
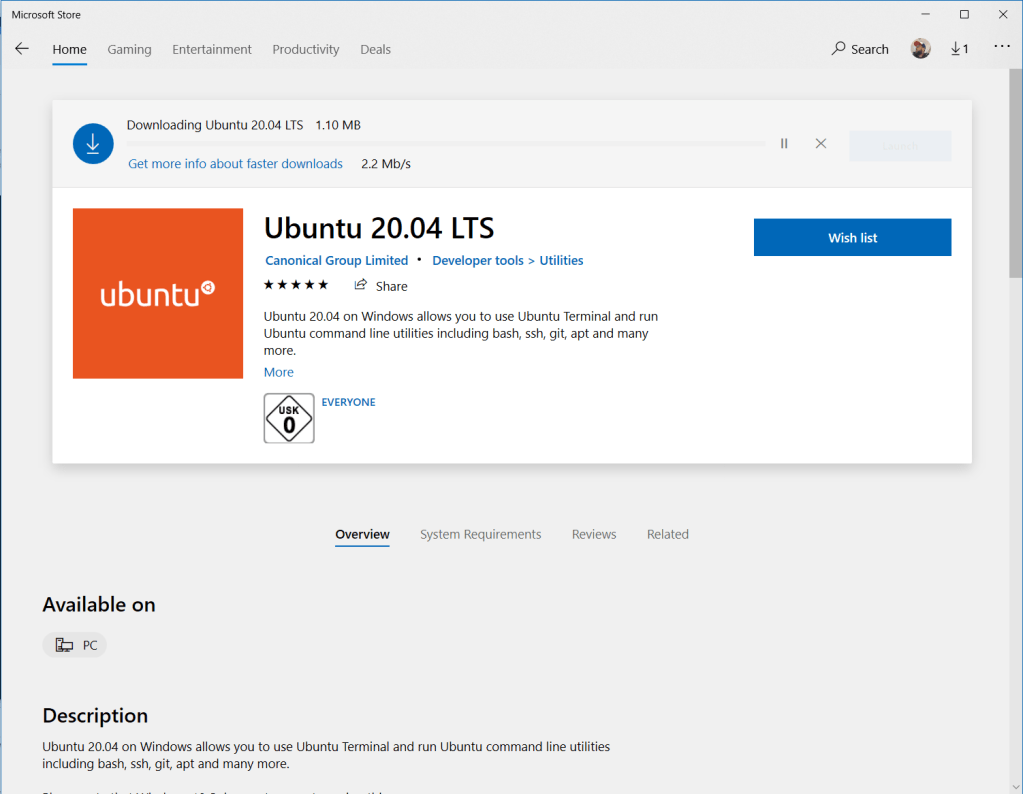
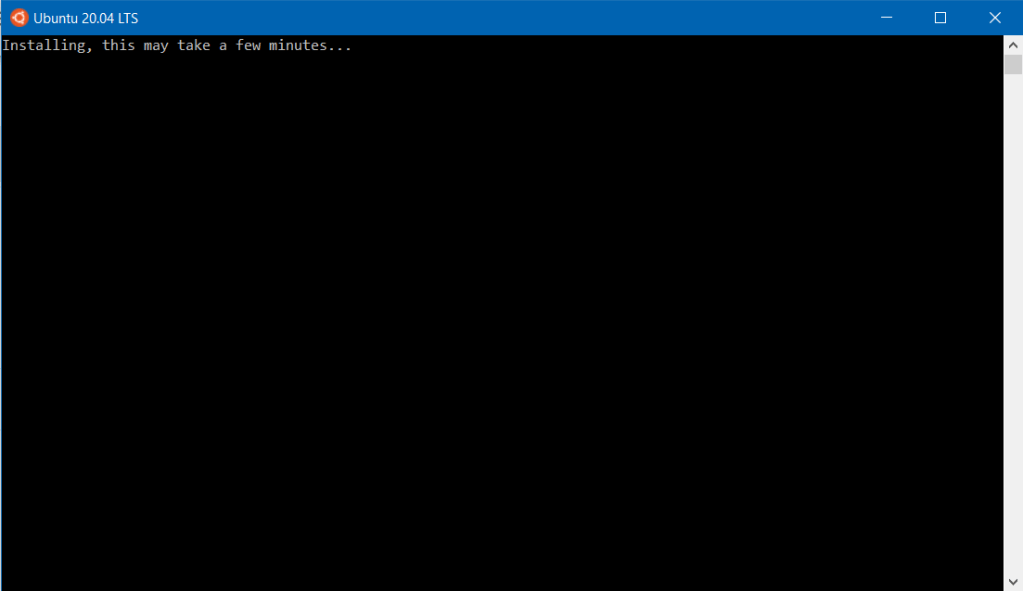
I decided to use Ubuntu 20.04 LTS, because I already know the distribution well and have used it for private purposes for some time – there are, of couse, others: Debian, openSUSE, Kali Linux etc. No matter which one you choose, the installation itself couldn’t be easier: all you have to do is open the Windows Store app, find the desired distribution and click “Install” (or simply click on this link for Ubuntu: https://www.microsoft.com/store/apps/9n6svws3rx71).
Once it is installed, you have to check if “version 2” of the subsystem for Linux is used (we have set “version 2” as default, but just in case…). Therefor, open a Powershell prompt and execute the following commands:
C:\> wsl --list --verbose
  NAME                   STATE           VERSION
* Ubuntu-20.04           Running         2
  docker-desktop-data    Running         2
  docker-desktop         Running         2
  Ubuntu-18.04           Stopped         2
If you see “Version 1” for Ubuntu-20.04, please run…
C:\> wsl --set-version Ubuntu-20.04 2
This will convert the distribution to be able to run in WSL2 mode (grab yourself a coffee, the conversion takes some time 😉 ).
Windows Terminal
Next, you need a modern, feature-rich and lightweight terminal. Fortunately, Microsoft also delivered on this: the Open Source Windows Terminal. It includes many of the features most frequently requested by the Windows command-line community including support for tabs, rich text, globalization, configurability, theming & styling etc.
The installation is also done via the Windows Store: https://www.microsoft.com/store/productId/9N0DX20HK701
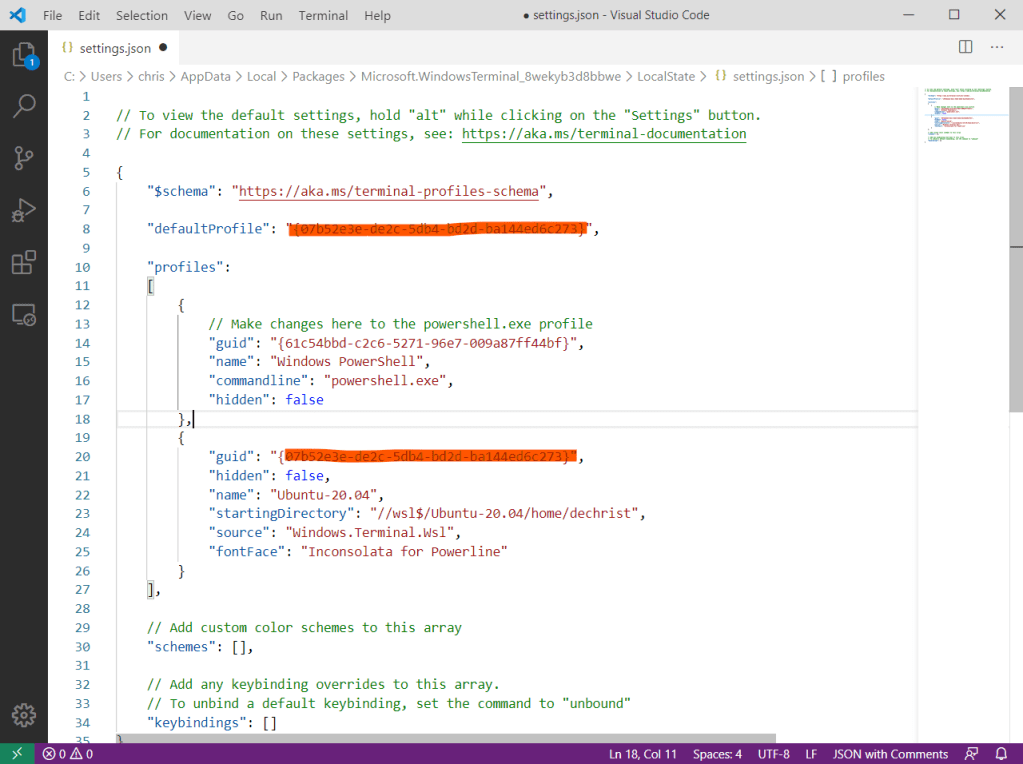
Once it’s on your machine, we can tweak the settings of the terminal to use Ubuntu 20.04 as the default terminal. Therefor, open Windows Terminal and hit “Ctrl+,” (that opens the settings.json file in your default text editor).
Add the guid of the Ubuntu 20.04 profile to the “defaultProfile” property:
Last but not least we upgrade all existing packages to be up to date.
$ sudo apt upgrade
So, the “basics” are in place now…we have a terminal that’s running Ubuntu Linux in Windows. Next, let’s give it super-powers!
Setup / tweak the shell
The software that is now being installed is an extract of what I need for my daily work. Of course the selection differs from what you might want (although I think this will cover a lot someone in the “Cloud Native” space would install). Nevertheless, it was important for me to list almost everything here, because it basically also helps me if I have to set up the environment again in the future 🙂
SSH Keys
Since it’s in the nature of a developer to work with GitHub (and other services, of course :)), I first need an SSH key to authenticate against the service. To do this, I create a new key (or copy an existing one to ~/.ssh/), which I then publish to GitHub (via their website).
At the same time the key is added to ssh-agent, so you don’t have to enter the corresponding keyphrase all the time when using it.
$ ssh-keygen -t rsa -b 4096 -C "your_email@example.com"
# start the ssh-agent in the background
$ eval $(ssh-agent -s)
> Agent pid 59566
$ ssh-add ~/.ssh/id_rsa
Oh My Zsh

Now comes the best part 🙂 To give the Ubuntu shell (which is bash by default) real superpowers, I exchange it with zsh in combination with the awesome project Oh My Zsh (which provides hundreds of plugins, customizing options, tweaks etc. for it). zsh is an extended bash shell which has many improvements and extensions compared to bash. Among other things, the shell can be themed, the command prompt adjusted, auto-completion can be used etc.
So, let’s install both:
$ sudo apt install git zsh -y
# After the installation has finished, add OhMyZsh...
$ sh -c "$(curl -fsSL https://raw.githubusercontent.com/ohmyzsh/ohmyzsh/master/tools/install.sh)"
When ready, OhMyZsh can be customized via the .zshrc file in you home directory (e.g. enable plugins, set the theme). Here are the settings I usually make:
- Adjust Theme
- Activate plugins
Let’s do this step by step…
Theme
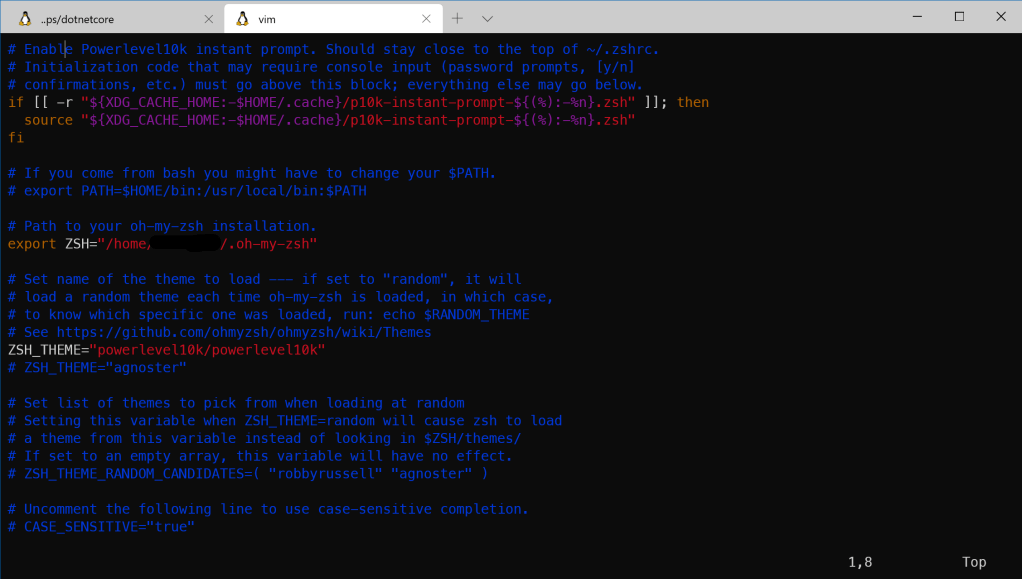
As theme, I use powerlevel10k (great stuff!), which you can find here.

The installation is very easy by first cloning the repo to your local machine and then activating the theme in ~/.zshrc (variable ZSH_THEME, see screenshot below):
$ git clone --depth=1 https://github.com/romkatv/powerlevel10k.git ${ZSH_CUSTOM:-~/.oh-my-zsh/custom}/themes/powerlevel10k
The next time you open a new shell, a wizard guides you through all options of the theme and allows you to customize the look&feel of your terminal (if the wizard does not start automatically or you want to restart it, simply run p10k configure from the command prompt).
The wizard offers a lot of options. Just find the right setup for you, play around with it a bit and try out one or the other. My setup finally looks like this:
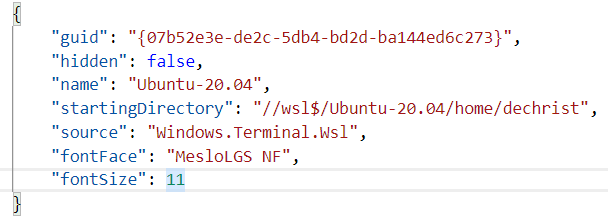
Optional, but recommended…install the corresponding fonts (and adjust the settings.json of Windows Terminal to use these, see image below): https://github.com/romkatv/powerlevel10k#meslo-nerd-font-patched-for-powerlevel10k
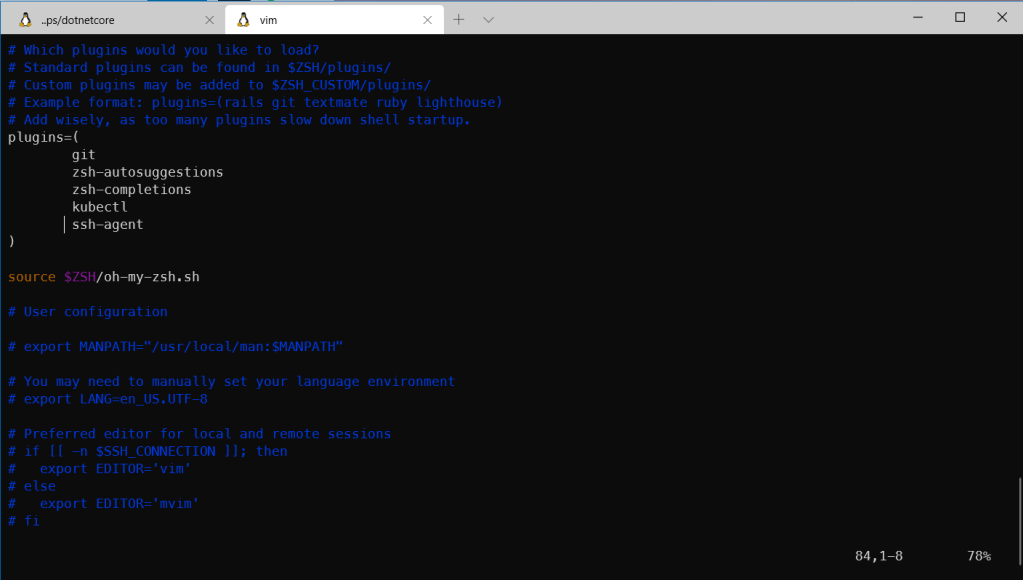
Plugins
In terms of OhMyZsh plugins, I use the following ones:
- git (git shortcuts, e.g. “gp” for “git pull“, “gc” for “git commit -v“)
- zsh-autosuggestions / zsh-completions (command completion / suggestions)
- kubectl (kubectl shortcuts / completion, e.g. “kaf” for “kubectl apply -f“, “kgp” for “kubectl get pods“, “kgd” for “kubectl get deployment” etc.)
- ssh-agent (starts the ssh agent automatically on startup)
You can simply add them by modifying .zshrc in your home directory:
Additional Tools
Now comes the setup of the tools that I need and use every day. I will not go into detail about all of them here, because most of them are well known or the installation is incredibly easy. The ones, that don’t need much explanation are:
- Azure CLI (
curl -sL https://aka.ms/InstallAzureCLIDeb | sudo bash) + kubectl (handy installer via Azure CLI:az aks install-cli) - Node Version Manager NVM (
wget -qO- https://raw.githubusercontent.com/creationix/nvm/v0.33.8/install.sh | zsh) and NodeJS LTS version (current: nvm install v12.18.0) - Azure Functions Core Tools (npm install -g azure-functions-core-tools@3)
- Terraform (https://www.terraform.io/downloads.html)
- Helm via get_helm.sh script(
curl -fsSL -o get_helm.sh https://raw.githubusercontent.com/helm/helm/master/scripts/get-helm-3) - Go (
sudo apt install golang) - .NET Core (simply follow https://docs.microsoft.com/en-us/dotnet/core/install/linux-package-manager-ubuntu-2004)
- jq – work with JSON data in the shell (https://stedolan.github.io/jq/download/)
Give me more…!
There are a few tools that I would like to discuss in more detail, as they are not necessarily widely used and known. These are mainly tools that are used when working with Kubernetes/Docker. This is exactly the area where kubectx/kubens and stern are located. Docker for Windows and Visual Studio Code are certainly well known to everyone and are familiar through daily work. The reason why I want to talk about the latter two is because they meanwhile tightly integrate with WSL2!
kubectx / kubens
Who doesn’t know it? You work with Kubernetes and have to switch between clusters and/or namespaces all the time…forgetting the appropriate commands to set the context correctly and typing yourself “to death”. This is where the tools kubectx and kubens come in and help you to switch between different clusters and namespaces quickly and easily. I never want to work with a system again where these tools are not installed – honestly. To see kubectx/kubens in action, here are the samples from their GitHub repo:


To install both tools, follow these steps:
$ sudo git clone https://github.com/ahmetb/kubectx /opt/kubectx
$ sudo ln -s /opt/kubectx/kubectx /usr/local/bin/kubectx
$ sudo ln -s /opt/kubectx/kubens /usr/local/bin/kubens
mkdir -p ~/.oh-my-zsh/completions
chmod -R 755 ~/.oh-my-zsh/completions
ln -s /opt/kubectx/completion/kubectx.zsh ~/.oh-my-zsh/completions/_kubectx.zsh
ln -s /opt/kubectx/completion/kubens.zsh ~/.oh-my-zsh/completions/_kubens.zsh
To be able to work with the autocomletion features of these tools, you need to add the following line at the end of your .zshrc:
autoload -U compinit && compinit
Congrats, productivity gain: 100% 🙂
stern
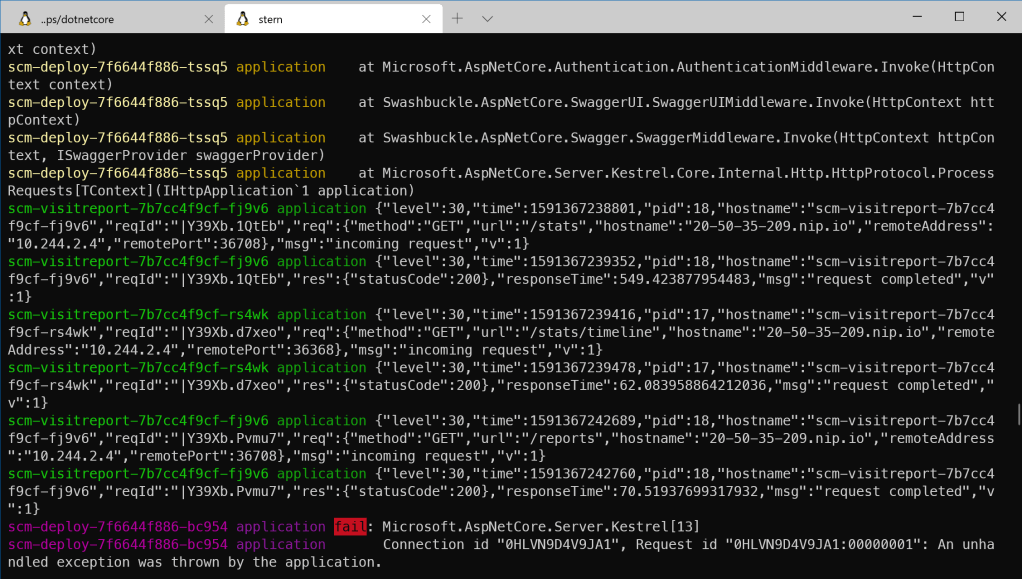
stern allows you to output the logs of multiple Pods simultaneously to the local command line. In Kubernetes it is normal to have many services running at the same time that communicate with each other. It is sometimes difficult to follow a call through the cluster. With stern, this becomes relatively easy, because you can select pods by e.g. label selectors from which you want to follow the logs.
With the command stern -l application=scmcontacts e.g. you can stream the logs of all pods with the label application=scmcontacts to your local shell…which then looks like that (each color represents another pod!):
To install stern, use this script:
$ sudo curl -fsSL -o /usr/local/bin/stern https://github.com/wercker/stern/releases/download/1.11.0/stern_linux_amd64
$ sudo chmod 755 /usr/local/bin/stern
One more thing
Docker for Windows has been around for a long time and is probably running on your machine right now. What some people may not know is that Docker for Windows integrates seamlessly with WSL2. If you are already running Docker on Windows, a simple invocation of the settings is enough to enable Docker / WSL2 integration:
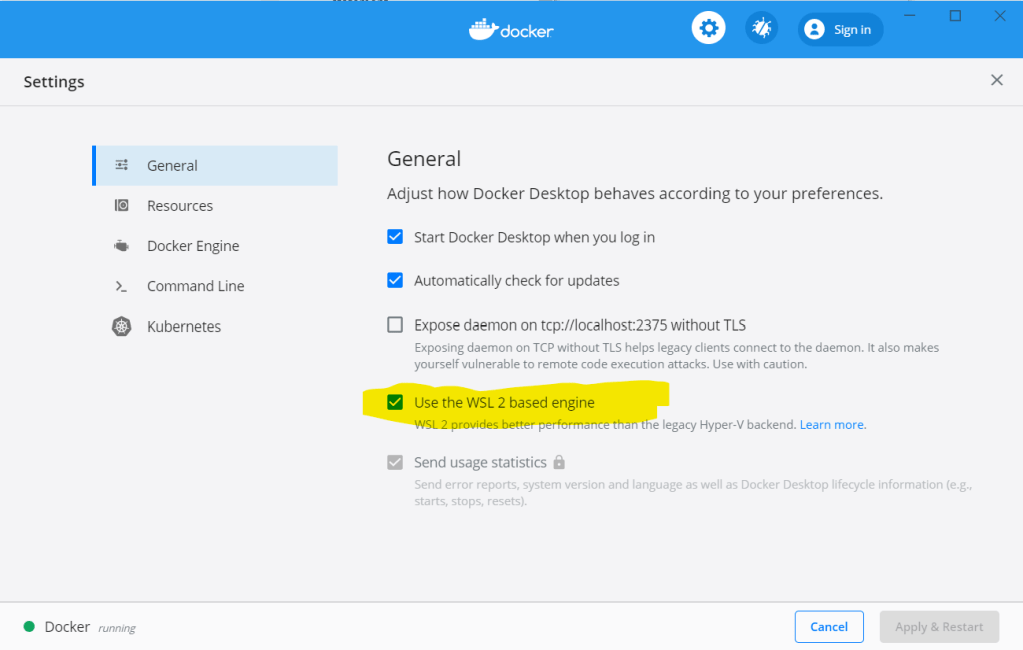
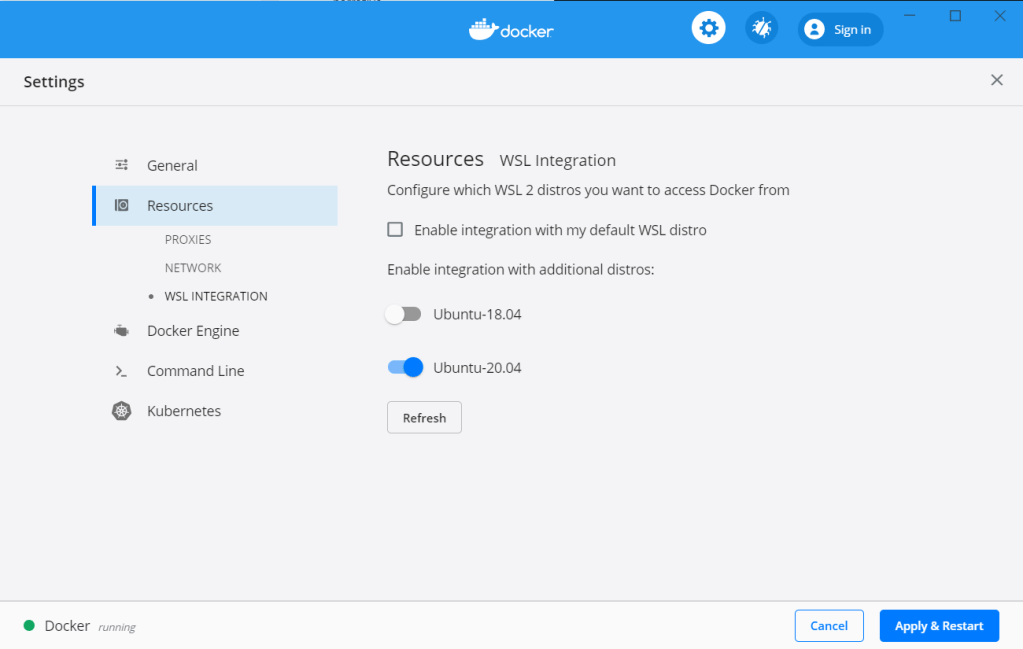
If you want more details about the integration, please visit this page: https://www.docker.com/blog/new-docker-desktop-wsl2-backend/ For this article, the fact that Docker now runs within WSL2 is sufficient 🙂
Last but not least, one short note. Of course, Visual Studio Code can also be integrated into WSL2. If you install a current version of the editor in Windows, all components to run VS Code with WSL2 are included.
A simple call of code . in the respective directory with your source code is sufficient to install the Visual Studio Code Server (https://github.com/cdr/code-server) in Ubuntu. This allows VSCode to connect remotely to your distro and work with source code / Frameworks that are located in WSL2.
That’s all 🙂
Wrap-Up
Pretty long blog post now, I know…but it contains all the tools that are necessary (take that with a “grain of salt” 😉 ) to make your Windows 10 machine a “wonderful experience” for you as a developer or architect in the “Cloud Native” space. You have a full compatible Linux “system”, which tightly integrates with Windows. You have .NET Core, Go, NodeJS, tools to work in the “Kubernetes universe”, the best code editor currently out there, git, ssh-agent etc. etc.…and a beautiful terminal which makes working with it simply fun!
For sure, there are thing that I missed or I just don’t know at the moment. I would love to hear from you, if I forgot “the one” tool to mention. Looking forward to read your comments/suggestions!
Hope this helps someone out there! Take care…
Photo by Maxim Selyuk on Unsplash
Edit: corrected script for Azure CLI.

It’s still much better to have a real Linux distribution for development purposes.
LikeLike
Well, basically you have a „real“ Linux in WSL2…it’s a kernel (with some adjustments) built from kernel.org. And if you have been using Win10 for development, you now also have all the wonderful tools from the Linux world…integrated in your normal workflow/environment.
LikeLike
can u show somewhere your terminal powerlevel theme setings colors?? yours look cool.
LikeLike
This is my current config: https://gist.github.com/cdennig/2b790ea05a73cdb2a10481f9e5af44c1
LikeLike
Are there plans for the WSL linux instance to be limited in caching to avoid starvation of the main windows system? https://www.reddit.com/r/programming/comments/gy0fur/wsl2_making_windows_10_the_perfect_dev_machine/
LikeLike
Regarding WSL2, I’m just a “normal user” at Microsoft 🙂 so no insights here, sorry. My guess: yes, as this has been reported not only once.
LikeLike
Yeah, I’ve tried a very similar setup several times.
WSL still too limited but primarily *fragile*
As soon as something goes south you’re basically screwed and the setup must be done again. You’re also at the mercy of features that ms deems worthy. What’s the advantage of this extra complexity? Why be stuck with the few versions of some anointed distros that perpetually closed-source company deems fit to host?
No thanks.
Here’s an idea – just use a Linux system to begin with – especially if you’re developing Linux tools.
If you’re a developer of windows but prefer a Linux environment then stick that cantankerous, opaque operating system in a vm. Snapshot the vm as soon as you’re setup. You can always restore that one.
Yes, great disclaimer at the outset and it does smack of homerism when you don’t even bother to discuss *why* anyone would want a Linux dev system inside a proprietary os.
An os who’s entire corporate history has been openly hostile to foss.
Pathetically tone deaf might be another take.
LikeLike
Thanks for your open and inclusive comment. I have to disappoint you though…the article is not about “Win vs. linux”. And it is not about Linux tool development on Windows (who would want to do that??). It’s about showing the new possibilities on Windows and the easiest way to set them up to have more fun with the “Cloud Native” world (thanks for the homerism). I show this with the example of my own workstation configuration. If this is not for you, then I am sorry. In the future I will try harder and try to meet your taste as well. I promise you.
And one more thing…I deliberately mentioned the fact that I work at Microsoft in the article again, although I already mention it explicitly on my blog. This simply has something to do with transparency.
Have a wonderful day… and again, thanks for your comment.
LikeLike
Title == “Making Windows 10 the perfect dev machine!”
Using adjectives that ascribe absolute, superior-value to your setup is the comparison. Your early “disclaimer” paragraph recounting Mac life does much the same. Read them as “I came from mac, and now I have the _perfect_ dev machine with Windows(R) and WSL2(tm)”
but, ahem, you’re totally unbiased right so I’m sure throughout the article _somewhere_ you’ll mention a
single annoyance?
From my perspective, when someone presents a biased overview then the disclaimer seems little more than a “don’t get offended by this” statement – it’s hollow and seems to exist solely to provide the (false) impression that you’re trying to be objective.
WSL has problems, caveats and exceptions that a user might also want to be aware of.. a well-reasoned piece might lay out even some of these. Especially a piece that opens smacking the reader with a “gosh, i might be considered biased” disclaimer at the outset.
as an aside, if someone points out obvious issues that you don’t mention – your immediate response tries to shift the conversation using identity language. okie dokie artichoke. Instead of assuming this is a personal issue maybe address the content of the critique.
But well reasoned discourse isn’t really your aim, is it?
LikeLike
Oh man…you have taken this to an emotional level and now you complain that this could be taken personally? You may have your reasons to hate the whole article – it’s your thing, okay. I can’t please everyone (I don’t want to)…certainly not you, if you get so upset about the title. It’s a tutorial on how to set up certain tools with Win10 / WSL2 so you feel comfortable with them and how this takes the whole dev experience on Windows to a whole new level (in a particular part of software development). It’s about how MY setup looks like! And as I share it, maybe it will help someone out there – which it definitely has already.
So ok, you want to hate it, hate it. But my time is too precious to argue with you about it. So, have a great time…
Cheers!
LikeLike
Thanks for the nice suggestions. I have an additional point for the .zshrc file.
If you work with multiple ssh-keys and you would have them added to the ssh agent everytime, you can add the following line to the .zshrc file to add the keys (key1, key2, …) automatically to the agent. If I remember correctly, the default settings only import the id_rsa key automatically.
zstyle :omz:plugins:ssh-agent identities key1 key2
If you do this, the keys will be imported the first time you start the console, everytime the agent was shutdown (e.g. after a reboot of the system).
LikeLike
Great…thanks for that one!
LikeLike
Thanks for the write-up. I was successful in getting everything set up, really nice. The only issue I have is I always start up in my windows user directory, (/mnt/c/Users/username) not my Ubuntu home directory. What did I miss?
LikeLike
Nothing 🙂 I forgot to mention that you can adjust that in the settings.json of Windows Terminal. Just add the property startingDirectory with a corresponding value (e.g. “//wsl$/Ubuntu-20.04/home/”) to the Ubuntu profile.
LikeLiked by 1 person
Ah, Nice. Thank you.
LikeLike
Amazing post- thank you! So fortunate this popped on on my android device (googles attempt to identifying posts which may be of interest).
I contribute to an open source project GitLab and have always been a Windows user. Unfortunately I was unable to get things setup either in WSL or on a virtual machine to a satisfactory level so decided to install Ubuntu native.
I was starting to get the hang of Ubuntu but needed a windows virtual machine to handle some of the work I do (Crystal Reports, SQL Management Studio etc).
I just did a fresh Windows 10 install (with the latest version) and WSL2 and i’m all up and running (and being new to Linux learnt some neat tricks and what is possible with bash/terminal etc).
Thanks again!
LikeLike
Appreciate your feedback! Happy to hear that 🙂
LikeLike
Hi, thanks for the post. I think wsl2 is a useful project, but after days lost in re-installing and configuring, debugging, I think in the end:
“As soon as something goes south you’re basically screwed and the setup must be done again.” is a valid comment.
Unfortunately is very true. If something change your network setup (i.e. you install new virtual adapter etc). Things break quickly! 😦 Having a unix based system is still better at this time in summer 2020. 😦
LikeLike
I’m sorry to hear that. I haven’t had a bad experience yet, but I hadn’t added or removed any new virtual adapters or anything like that. Nevertheless, thanks for your feedback! And yes, in this case a “full-blown Unix” is probably still the safer choice then…
LikeLike
This does not work:
> curl -sL https://aka.ms/InstallAzureCLIDeb | sudo zsh
I had do that instead:
> curl -sL https://aka.ms/InstallAzureCLIDeb | sudo bash
It seems that the downloaded script at some point it tries to execute some “shopt” command that is known by bash but not by zsh.
LikeLike
You’re totally right…thanks for reporting
LikeLike
Thanks for this post. This along with the official documentation was very helpful in setting up WSL environment, however, there is one problem, that I would like to point out. WSL does not allow access to hardware, and maybe this was intended to replicate the features of virtual machines, where even the most critical damage to the VM, would not show up to the host OS, however, in this case, working with USB devices in WSL environments is not possible, and in my use case of learning OpenCV with a webcam, I had to run it on Windows environment and with CMD or Powershell.
LikeLike
Yes, that is correct. USB devices (also the serial port) aren’t supportet yet…and I bet it will take some time to see that in WSL2, because the focus was on making the GPU available. Which is now possible, at least as a “preview feature” AFAIK.
Thanks for your comment!
LikeLike
Although beeing more a Linux than a Windows guy, I really like this approach e.g. if you are “forced” to use a Windows environment by your company.
But in my company, we struggle with the operational processes involved in such a setup: While the underlying Win-OS is managed by standard software deployment, AD integration and endpoint protection, it is unclear how to do that with the Lin-OS on top.
E.g. while the kernel itself seems to be updated on a regular basis (hopefully) by Windows Update, there is no such thing, at least not centralized, for the Linux packages.
Is this a concern of you, too, or better, has this already been addressed by someone?
LikeLike
Hey Ali, there’s information on the official docs about how to run WSL2 in the enterprise: https://docs.microsoft.com/en-us/windows/wsl/enterprise. Hope that helps.
LikeLike