

I’ve been working with Aurelia for quite a while now…well, since it has been released as an alpha version. I think it’s one of the best SPA frameworks out there and I’m heavily relying on the work of Rob Eisenberg and his team when it comes to production apps as well as example apps during my work at Microsoft.
Today, I want to show you how to deploy an Aurelia app via Visual Studio Team Services (VSTS), how to setup a Continuous Integration pipeline and automatically deploy the build artifacts to an Azure App Service.
As an example app, I’m taking the “Contacts Manager App” from the Aurelia team on GitHub. You can find it here.

To be able to work with the repository in Visual Studio Team Service, I have forked the repository into my own GitHub account.
Visual Studio Team Services
If you don’t have a VSTS account yet, you can create one for free at the VSTS website. What you will get:
- a complete DevOps platform for your development team (up to five members)
- Code Hosting (TFVC, Git)
- Agile Tools (issue/ticket tracking, dashboards, Scrum / Kanban templates…)
- Continuous Integration
- Release Management
- Web-/Load-Test environment
The first step, before we can create the continuous integration pipeline, is to add a new project in VSTS.

You give it a name and select the desired version control system, project templates and security settings. As we are connecting our build to the source code repository from GitHub and won’t be using the issue tracking system in VSTS, these settings are not important at the moment (except security, of course).
Build The Project
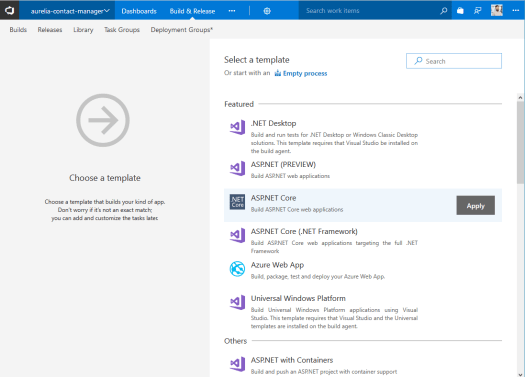
To create the continuous integration pipeline, switch to the “Build Definitions” view via the main menu “Build & Release” and click “New“. The creation-wizard appears where you can select a template for the build you want to execute. We will start with an empty definition, so click on “Empty process“.
On the next screen, give your build definition a name and select a default agent queue. Basically, you can pick any of the agents in the list. As we will be using the command line task to execute the Aurelia Command Line Interface (to build the Aurelia app), you have to select a Windows based agent (needless to say, that you can also run the Aurelia CLI on a Linux based system).

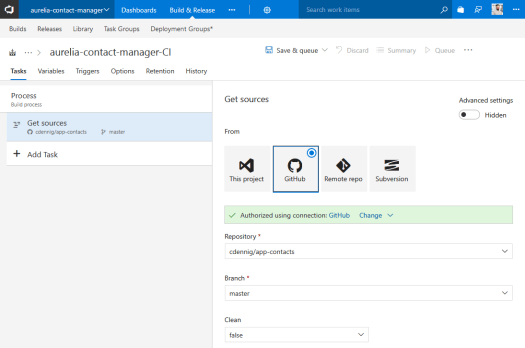
On the “Get Sources” task, you select you project you wish to build in the current build definition. As you select GitHub, VSTS will automatically add a connection to the platform for you which you can reuse in other build definitions. Afterwards, just select the appropriate project and branch in GitHub and you are done with that task.
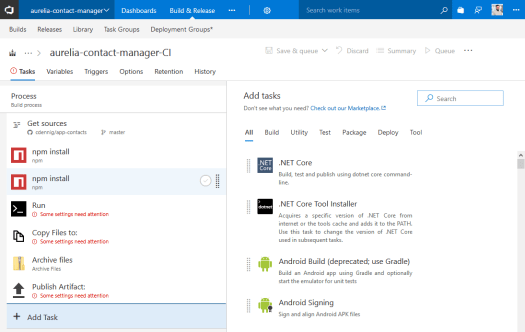
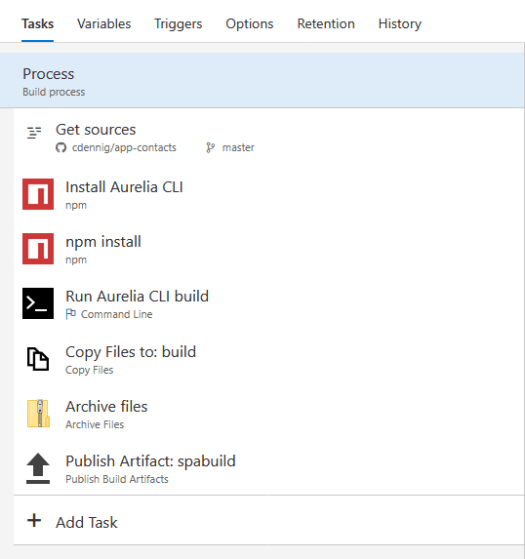
To build the Aurelia sources, add the following tasks:
- NPM to install the Aurelia CLI
- NPM to install all the dependencies of Aurelia project
- Command Line to execute the Aurelia CLI build task
- Copy Files to copy artifacts into a build folder where all files of the application will be put in
- Archive Files to create a ZIP file from content of the build folder
- Publish Build Artifacts – well 🙂
Your build process should look now similar to that:
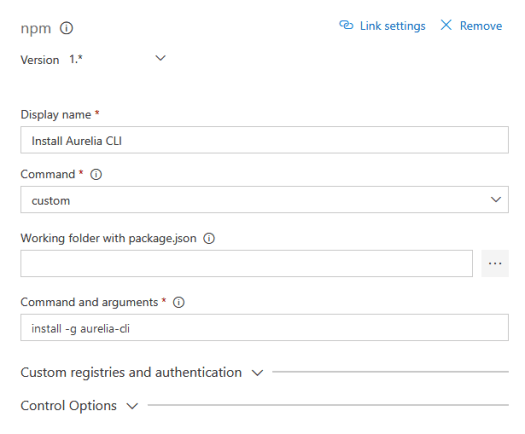
NPM Task #1
The first NPM task in our build process will be installing the Aurelia Command Line Interface onto our build agent. Click on the task in the list on the left and give the build step a display name and switch the “Command” drop-down from “Install” to “Custom“. In the “Command and arguments” field insert “install -g aurelia-cli“. The NPM command will be globally installing the CLI.
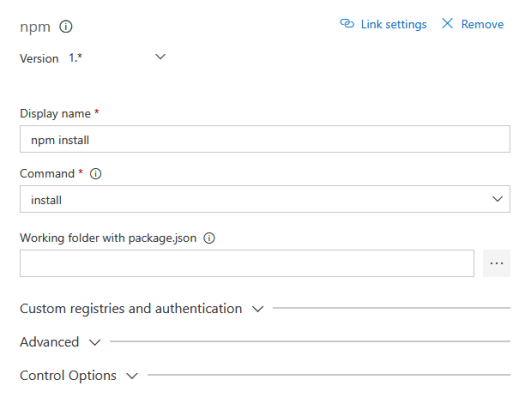
NPM Task #2
The second NPM task will be installing all the project dependencies of our Aurelia application. As done before, give the task a name and leave all the other settings as provided by the VSTS template.
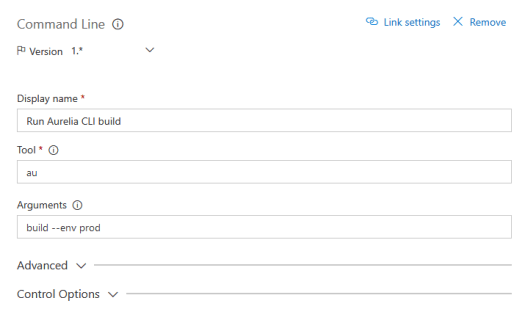
Command Line Task
The Command Line task is responsible for executing the Aurelia CLI to build the application for us (uglify, bundling, minification, building source maps etc.). Basically, the task will execute the following script:
au build --env prod
To run the CLI from our task, enter “au” in the “Tool” and “build –env prod” in the “Arguments” field.
Copy Files Task
To run our application on Azure, we need a few additional files from the project. First, we need the build results from the Command Line Task that was executed before. Second, the index.html and favicon.ico files are also needed. To be able to package all the files into one archive (next step in the build process), we copy all the necessary artifacts into one build folder. To achieve this, enter the following line in the “Contents” textbox:
index.html
favicon.ico
scripts/**
In the “Target Folder” enter “build” .
The whole build task should now look like that:

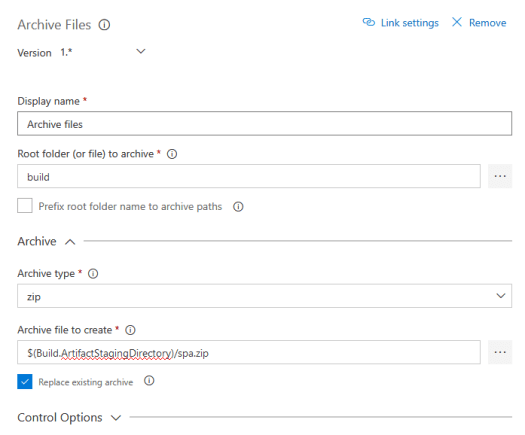
Archive Files Task
The archive task will package our application into one ZIP file which we can use in the release pipeline to deploy the application to an Azure Web App. To bundle all the files, enter “build” in the “Root folder (or file) to archive” and “$(Build.ArtifactStagingDirectory)/spa.zip” in the “Archive file to create” field. The ZIP file will then be placed in the artifact staging directory from where we can publish the file afterwards.
Also please make sure to uncheck “Prefix root folder name to archive paths“, otherwise the archive contents will remain in the same folder structure as they are currently in the build directory.
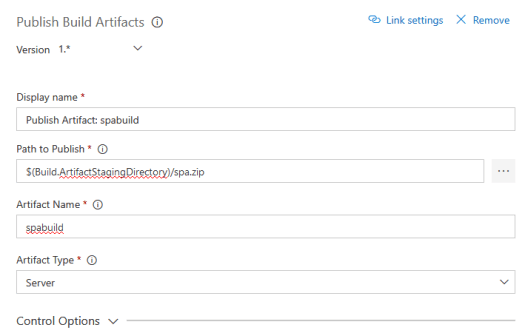
Publish Build Artifacts
To publish the artifacts of our build process, simply enter “$(Build.ArtifactStagingDirectory)/spa.zip” in the “Path to Publish” field an give the artifact a proper name (in my case “spabuild“).
Result
After going through all these configuration steps, the build process should look like that in your own build pipeline.
To execute the build, press “Save & Queue” from the menu. If you want to kick-off a new build every time the source code is updated, switch to the “Triggers” tab and enable “Continuous Integration“.
While the build is running, let’s create the release pipeline.
Release Pipeline
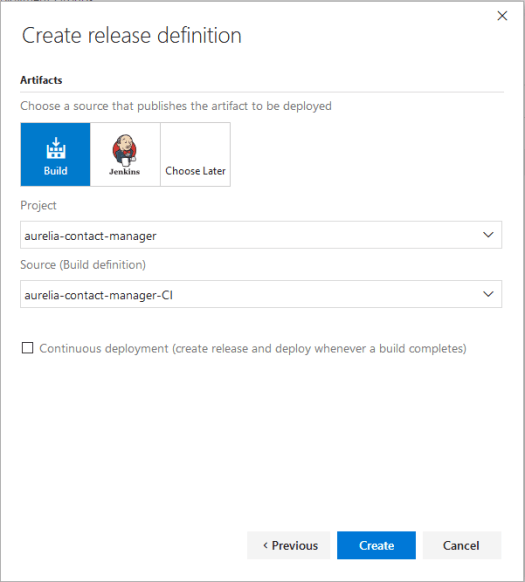
To create a release definition in VSTS, head over to the “Releases” view and click on the plus-button and “Create release definition“. A wizard will appear where you select the “Azure App Service Deployment” template.

On the next screen, you have to define the connection to the build definition (and the corresponding artifacts) which you have created before. Select the project and the correct build definition. If you want to deploy a new version every time the build is successful, check “Continuous deployment (create release and deploy whenever a build completes)“.
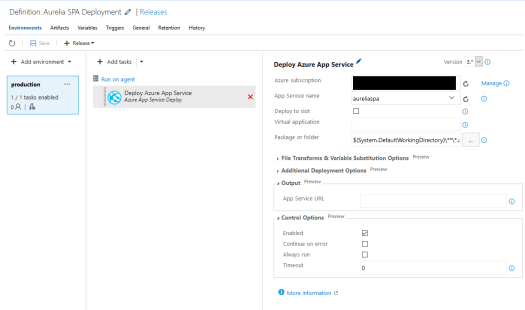
To configure the deployment task, you have to select the Azure subscription where your target App Service is running (you should have created the App Service before, of course). After selecting (or adding via “Manage“) the subscription, choose the correct App Service name from the drop-down field and leave the rest of the settings as is. It should now look similar to this:
Click “Save” and “Release –> Create Release“. A new deployment is started and you can follow the progress by checking the logs of the running agent:
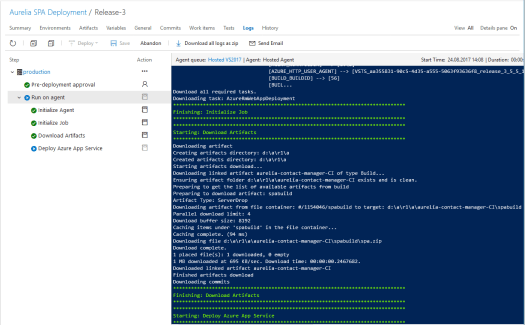
After a certain amount of time, the new version of the Aurelia app is deployed to your Web App and you can check the results by opening the corresponding website:

Wrap Up
As you could see, it is really easy to automatically deploy an Aurelia App to an Azure App Service via Visual Studio Team Services. Of course, in a production environment, we would deploy the new version of the website to a deployment slot and after double-checking that everything works as desired, switch the staging slot with the production slot. Nevertheless, I hope you got an impression of how elegant and straight-forward the whole CI-/CD-process for Aurelia is with Visual Studio Team Services!
Have fun with it 🙂

Check out Robs Twitter feed he’s Hiring!
LikeLike
Already saw it…
LikeLike