

Modern applications that are hosted in Azure consist of many different components / services that communicate, exchange data, and between which there is a more or less dependency. Even simple applications consist of a database, a cache, an API, a web page, etc. – so many individual components that want to be managed.
Azure Portal
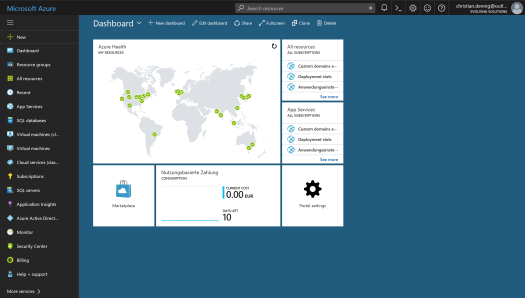
To create and manage such services in Azure, Microsoft provides the Azure Portal as the first port of call. The interface offers a comfortable UI, with which one can create and manage all services offered by Azure. It is ideal for developers who want to quickly try a service, create simple prototypes or a proof-of-concept – even smaller projects can be managed adequately via the portal.
However, it also has its drawbacks – especially when one project grows larger and several people work simultaneously on the infrastructure. Who can understand, why this one setting, which currently causes problems, was made two weeks ago via the portal on the web app? Who set the number of instances within a VM scale set from “4” to “6” – and above all…why was this resource deleted and who knows how it can be restored? Yes, for such things, there is also “Role-Based Access Control” to prevent specific persons / roles from making settings. At the latest, however, when the entire infrastructure has to be re-created (with all interdependent dependencies), you realize that you must manage your environment in a different way.
Azure Resource Manager / Templates
Before you can get into the Azure Resource Manager and the related templates, we need to clarify some terms:
- Resource – an element manageable over Azure. For example: a virtual machine, a database, a web app etc.
- Resource Group – a container for resources. A resource can not exist in Azure without a ResourceGroup (RG). Deployments of resources are always executed on an RG. Typically, resources with the same lifecycle are grouped into a group.
- Resource Provider – a service for creating a resource through the Azure Resource Manager. For example, “Microsoft.Web” to create a web app, “Microsoft.Storage” to create a storage account etc.
- Azure Resource Manager (ARM) Templates – a JSON file that describes one or more resources that are deployed into a Resource Group. The template can be used to consistently and repeatedly provision the resources.
As can be inferred from the information provided above, the Azure Resource Manager (ARM) is the component in the Azure Cloud that takes care of providing and managing resources. Individual services or groups of resources are managed via ARM. ARM templates can also be used to repeatedly deploy an infrastructure.
One, in my opinion, great advantage when using ARM templates is the traceability of changes to the infrastructure. Templates can be stored together with the source code of the application in the source code repository. If you have established Continuous Integration / Deployment in your development process, you can execute the deployment of the infrastructure from Jenkins, TeamCity or Visual Studio Team Services, for example, and no one has to worry about an update of the environment – web apps, databases, caches etc will be created, afterwards the actual application is deployed (either in one step or separately) – no manual steps are necessary.
But – first things first – what does a simple ARM template look like? Here is an example of a simple web app:
{
  "$schema": "https://schema.management.azure.com/schemas/2015-01-01/deploymentTemplate.json#",
  "contentVersion": "1.0.0.0",
  "parameters": {
    "hostingPlanName": {
      "type": "string",
      "defaultValue": "mytestappplan",
      "minLength": 1
    },
    "skuName": {
      "type": "string",
      "defaultValue": "S1",
      "allowedValues": [
        "S1",
        "S2",
        "S3"
      ],
      "metadata": {
        "description": "Describes plan's pricing tier and capacity. Check details at https://azure.microsoft.com/en-us/pricing/details/app-service/"
      }
    },
    "skuCapacity": {
      "type": "int",
      "defaultValue": 1,
      "minValue": 1,
      "metadata": {
        "description": "Describes plan's instance count"
      }
    }
  },
  "variables": {
    "webSiteName": "[concat('webSite', uniqueString(resourceGroup().id))]"
  },
  "resources": [
    {
      "apiVersion": "2015-08-01",
      "name": "[parameters('hostingPlanName')]",
      "type": "Microsoft.Web/serverfarms",
      "location": "[resourceGroup().location]",
      "tags": {
        "displayName": "HostingPlan"
      },
      "sku": {
        "name": "[parameters('skuName')]",
        "capacity": "[parameters('skuCapacity')]"
      },
      "properties": {
        "name": "[parameters('hostingPlanName')]"
      }
    },
    {
      "apiVersion": "2015-08-01",
      "name": "[variables('webSiteName')]",
      "type": "Microsoft.Web/sites",
      "location": "[resourceGroup().location]",
      "tags": {
        "[concat('hidden-related:', resourceGroup().id, '/providers/Microsoft.Web/serverfarms/', parameters('hostingPlanName'))]": "Resource",
        "displayName": "Website"
      },
      "dependsOn": [
        "[resourceId('Microsoft.Web/serverfarms/', parameters('hostingPlanName'))]"
      ],
      "properties": {
        "name": "[variables('webSiteName')]",
        "serverFarmId": "[resourceId('Microsoft.Web/serverfarms', parameters('hostingPlanName'))]"
      }
    }
  ]
}
Admittedly, at first sight, such a template looks wild and for a single web page probably also “too much”, but on a closer look however, this impression dissolves quickly.
An ARM Template usually consists of several parts:
- Parameters – Parameters that are passed from the outside to the template. Example in the above template: “hostingPlanName”. Parameters can be typed and equipped with default values or permitted values (“allowedValues”).
- Variables – variables for internal use. Typically, parameters are “edited”, e.g. names are concatenated and stored in variables for later use. Example in the above template: “webSiteName”.
- Resources – the actual resources to be created
- Outputs – Output parameters that are returned to the caller after the resources are created.
In the template, simple functions such as concat, uniqueString, or toLower can be used to work with variables. A detailed overview of the available functions can be found here: https://docs.microsoft.com/de-de/azure/azure-resource-manager/resource-group-template-functions
The “Resources” section of the template is responsible for creating the resources, as mentioned above. The settings for the resource provider are defined here. Needless to say, each provider type offers different parameters and sections for the configuration of the resource to be created – the corresponding documentation for each provider can be found here under the topic Reference: https://docs.microsoft.com/en-us/azure/templates/
In the sample template, a web application is created – the responsible resource provider is “Microsoft.Web/sites“. An important element in the section mentioned here is the node “dependsOn”. Using this resource, dependencies can be defined using the resource ID. In this particular case…
"dependsOn": [
        "[resourceId('Microsoft.Web/serverfarms/', parameters('hostingPlanName'))]"
]
…so that the web app is dependent on the app service plan (“Microsoft.Web/serverfarms/“) into which the app is deployed – which also appears logical. Based on the “dependsOn” data, the Azure Resource Manager can build a deployment tree, starting with the creation of the resources first that don’t depend on any other.
The template can ultimately be submitted to the Resource Manager in various ways:
- Powerhell
- Azure CLI
- REST
- Visual Studio
- …
I like to work with the Azure CLI, because it is cross-platform (MacOS, Linux and Windows). So here is the example with the CLI:
First, a resource group must be created (if it does not exist):
az group create --name testdeployment --location westeurope
After successful execution, the output should look as follows:
{
  "id": "/subscriptions/[subscriptionid]/resourceGroups/testdeployment",
  "location": "westeurope",
  "managedBy": null,
  "name": "testdeployment",
  "properties": {
    "provisioningState": "Succeeded"
  },
  "tags": null
}
The actual deployment can then be run afterwards (“WebSite.json” is the template file with the content shown above in the current directory):
az group deployment create --mode complete --resource-group testdeployment --template-file .\WebSite.json --verbose
In the example above, the “complete” mode is selected to apply the template. There are two modes that can be used:
- Complete – resources that are not present in the template, but do exist in the resource group, are deleted.
- Incremental – resources that are not present in the template, but exist in the resource group, remain unchanged.
Both modes have advantages and disadvantages and you have to find the appropriate mode for yourself. Personally, I prefer Complete, since this mode describes the infrastructure how it should look like after the deployment.
After a short amount of time, the deployment has been successful and the command returns the results from the Azure Resource Manager.
{
  "id": "/subscriptions/[subscriptionid]/resourceGroups/testdeployment/providers/Microsoft.Resources/deployments/WebSite",
  "name": "WebSite",
  "properties": {
    "correlationId": "1fbfa8f1-44dd-483c-ab9b-38296cd834b7",
    "debugSetting": null,
    "dependencies": [
      {
        "dependsOn": [
          {
            "id": "/subscriptions/[subscriptionid]/resourceGroups/testdeployment/providers/Microsoft.Web/serverfarms/mytestappplan",
            "resourceGroup": "testdeployment",
            "resourceName": "mytestappplan",
            "resourceType": "Microsoft.Web/serverfarms"
          }
        ],
        "id": "/subscriptions/[subscriptionid]/resourceGroups/testdeployment/providers/Microsoft.Web/sites/webSitesycktqb3r6rze",
        "resourceGroup": "testdeployment",
        "resourceName": "webSitesycktqb3r6rze",
        "resourceType": "Microsoft.Web/sites"
      }
    ],
    "mode": "Complete",
    "outputs": null,
    "parameters": {
      "hostingPlanName": {
        "type": "String",
        "value": "mytestappplan"
      },
      "skuCapacity": {
        "type": "Int",
        "value": 1
      },
      "skuName": {
        "type": "String",
        "value": "S1"
      }
    },
    "parametersLink": null,
    "providers": [
      {
        "id": null,
        "namespace": "Microsoft.Web",
        "registrationState": null,
        "resourceTypes": [
          {
            "aliases": null,
            "apiVersions": null,
            "locations": [
              "westeurope"
            ],
            "properties": null,
            "resourceType": "serverfarms"
          },
          {
            "aliases": null,
            "apiVersions": null,
            "locations": [
              "westeurope"
            ],
            "properties": null,
            "resourceType": "sites"
          }
        ]
      }
    ],
    "provisioningState": "Succeeded",
    "template": null,
    "templateLink": null,
    "timestamp": "2017-05-23T16:20:27.645497+00:00"
  },
  "resourceGroup": "testdeployment"
}
Outlook
With the example shown above, a first introduction to the topic “Azure Resource Manager” and the corresponding templates has been made. Those who wish to get deeper into the topic can get more information via the following resources:
- https://docs.microsoft.com/en-us/azure/azure-resource-manager/
- https://docs.microsoft.com/en-us/azure/templates/
- https://github.com/Azure/azure-quickstart-templates (huge repository from Microsoft with sample templates)
In the next article, I’ll go into more detail on templates and show an advanced scenario that describes the complete infrastructure for a cloud app (API app including deployment slots, SQL DB, Redis Cache, Azure Search, AppInsights…).
Until then…have fun with Azure! 🙂

One Reply to “”